Dynamic Checkweigher Calibration
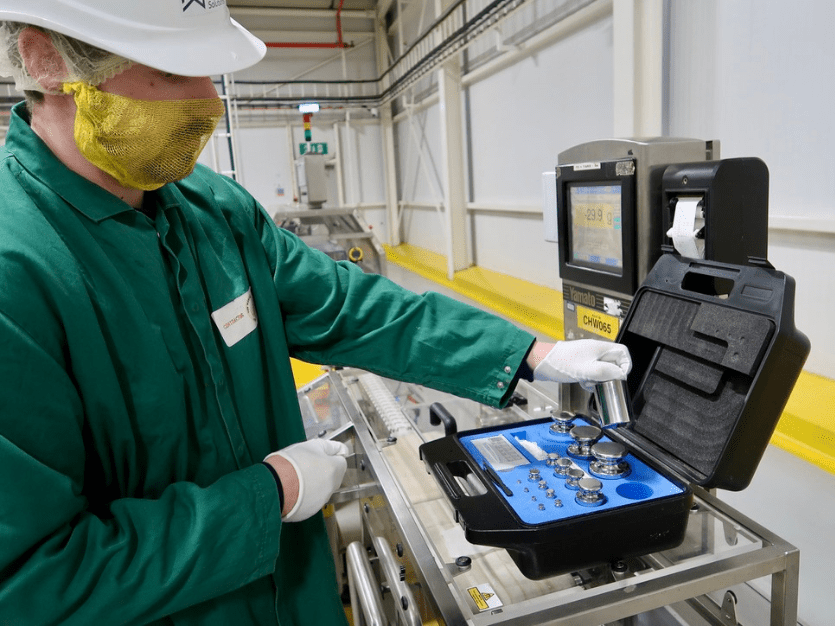 In high-speed production environments, from snacks and confectionery to pharmaceuticals and industrial components, dynamic checkweighers are the frontline instruments that ensure every pack meets weight specification, legal requirements and brand promise.
At Micro Weighing Solutions we combine metrology best practice with pragmatic, production-aware engineering to deliver dynamic checkweigher calibration services that minimise downtime, reduce risk and give you defensible measurement confidence across your whole line.
Book Dynamic Checkweigher Calibration
Minimise downtime and leave audit-ready “as found / as left” documentation with stated uncertainty and traceability. Request a Quote & Earliest Availability by using the enquiry form >>>>
What “dynamic” calibration means for checkweighers
A dynamic checkweigher differs from a static balance because it measures moving packages at line speed. Calibration therefore is not simply a one-off static comparison against a reference weight, it must replicate production conditions, verify the instrument’s response at speed, and quantify performance across the operating range.
Dynamic calibration checks belt speed effects, sensor timing/sampling, rejection timing, mechanical alignment and the interaction between the weighing head and upstream/downstream conveyor mechanics. It also verifies the entire measurement chain: transducer(s), junction boxes, electronics, and the checkweigher controller and software.
Our approach, metrology-led, production-aware
Our calibration approach is structured around three principles: traceability, realism and reproducibility.
- Traceability and documented uncertainty. Every calibration we perform is linked to national standards through an unbroken chain of comparisons. We document measurement uncertainty for each test point so you can evaluate conformity against specification or regulatory limits. We also provide full certificates that show test conditions, reference standards and environmental details.
- Realistic, in-line simulation. We calibrate under conditions that mimic your process: representative package types, typical line speeds, and the mounting and product transit dynamics that influence measurement. Where possible we use your process packaging and fixtures to ensure calibration results translate directly to on-line performance.
- Reproducible measurement protocol. We apply multi-point, bi-directional and repeatability checks, plus ancillary tests (e.g., creep, hysteresis where applicable) to provide a complete picture of a machine’s performance. Our protocols are informed by best practice for dynamic weighing and by the failure modes we encounter in the field.
What we test and why it matters
- Span and linearity across the working range. We verify accuracy at multiple points (low, mid and high loads or weights) to ensure linear response and to detect non-linearity that can invalidate single-point adjustments.
- Repeatability and short-term stability. High-speed lines demand consistent readings across repeated packages. Repeatability confirms the checkweigher will make the same decision for identical loads under the same conditions.
- Hysteresis and directionality. For some systems the difference between increasing and decreasing load can be significant; we test for hysteresis and quantify it.
-
Timing, sampling and dynamic response. We check that the sample rate, electronic filtering and trigger timing reliably capture weight while the pack is in transit and that rejection/accept actions are correctly timed.
- Conveyor and mechanical integration. Misalignment, belt vibration, or poor isolation are common sources of error. We assess mechanical coupling and recommend remedial actions where necessary.
- Software and settings verification. We audit the checkweigher’s configuration (filters, speed compensation, tare tables, diagnostics and alarms) and verify settings against the documented program and operational needs.
Equipment we use and methods we employ
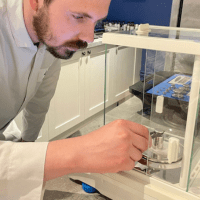
MWS use traceable reference masses designed for dynamic applications. For in-line calibration we use calibrated test packages or reference loads that reflect your product geometry and centre-of-mass. When laboratory-level uncertainty is required we offer controlled-environment bench calibration where we can isolate the transducer and measure span and linearity to tighter tolerances.
Our technicians use data logging and report-generation tools to capture time-stamped measurement streams, enabling post-test analysis and visualisation of trends (e.g., weight vs time, deviation histograms and control charts). All reference equipment is maintained on a documented schedule and re-calibrated to national standards.
Performance Validation
At MWS we offer performance validation schedules to meet our customers’ needs and to help them achieve the levels of compliance they require to meet audits and client specifications. A performance validation certification is a certain requirement for manufacturers who want to trade with major supermarkets and to also be compliant with BRCGS and EFSIS standards of GMP (Good Manufacturing Practice).
Minimising production impact
We design every job to reduce production interruption. Typical measures include:
- Pre-job planning and risk assessment with plant teams.
- Night or shift-based scheduling.
- Use of quick-apply reference packages or temporary diversion conveyors.
- Rapid data capture and on-the-spot reporting to allow immediate decisions.
We also offer preventative calibration programmes and remote monitoring options that transform calibration from a reactive event into an integrated part of your quality-control plan.
Compliance, auditability and documentation
Our certificates include as-found and as-left reports, measurement uncertainty, environmental conditions and traceability statements. For regulated industries we can perform UKAS-accredited calibration where required, or supply traceable calibration with detailed uncertainty budgets for internal quality management. We also provide validation and FAT/SAT support and supply the documentary evidence auditors require.
Training and preventative maintenance
Calibration is only one element of maintaining a healthy checkweigher. We offer operator training (daily checks, verification tests and quick diagnostics) and planned maintenance packages to reduce drift and avoid unplanned failures. Our preventative programmes combine scheduled calibration with mechanical inspections, belt alignment checks and electronics health checks.
Why choose Micro Weighing Solutions?
MWS brings a blend of metrology expertise, practical industry experience and production-first service delivery. We understand dynamic weighing isn’t just about numbers, it’s about keeping your line running, protecting brand reputation, and ensuring regulatory compliance. Our technicians are experienced with a wide range of manufacturers and control systems and our service model is designed to be flexible: on-site rapid response, scheduled site calibration projects, or laboratory characterisation.
Next steps to working with Micro Weighing Solutions
If you’d like to discuss a calibration programme, request a quote, or arrange an on-site survey, contact Micro Weighing Solutions. We will assess your line, propose a calibration protocol tailored to your product and process, and provide a transparent cost and timeline estimate. Our goal is to give you measurement certainty that supports production efficiency, product quality and regulatory compliance.
Micro Weighing Solutions can arrange the calibration of your metal detection systems to ensure that the equipment is working and operating within the manufacturer’s parameters and working to its full capability. We use traceable test sticks to carry out the test and issue a certificate after the process is complete. We help you stay compliant with our calibration and performance verification service.
Checkweigher Calibration
"*" indicates required fields
